Les commandes sont toujours soignées et livrées rapidement. Les prix souvent intéressants.


Product information
Description
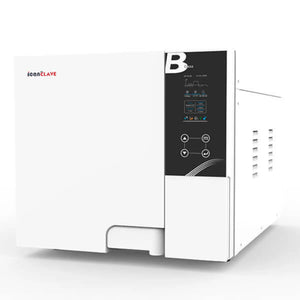
12-liter white Class B autoclave with USB and integrated printer
Details of the guarantees
Security
- It is essential that the water quality be less than 20 microsiemens for the autoclave to be able to start the cycles.
- The cycle will not start if the door is not properly closed.
- The automated safety system with a double hydraulic locking device prevents the door from opening while the chamber is under pressure.
- The safety valves prevent the pressure generator and the camera from working.
- A safety thermostat prevents overheating in the room and the generator
- An automatic safety lock prevents accidental opening of the door during the sterilization process protector automatically cuts off the electrical power if there is a short circuit somewhere or the power supply is not very stable.
- Fault alarm indicates a failure cycle and the detailed error code.
- Door alarm indicates that the door is not secured.
- Low water alarm indicates when the water tank is empty or too full.
Technical specifications
- Voltage: 220-240 VAC; 50/60Hz; 10A
- External dimensions of the device: W x H x D: 420 x 370 x 595 mm
- Tabletop dimensions: 315 x 160 mm
- Circuit breaker: F16A / 400V
- Rated power: 1500 VA
- 1750W
- Sterilization temperature: 121°C / 134°C
- Distilled water tank capacity: 2.5 L
- Operating temperature: 5°C / 40
- Relative humidity: Max. 80%, non-condensing
- Net weight: 40 kg
- Maximum noise level: <70 dB
- Atmospheric pressure of 76 kPa / 106 kPa
Icanclave Autoclave: Maintenance and Error Message Guide
Components
- Distilled water reservoir
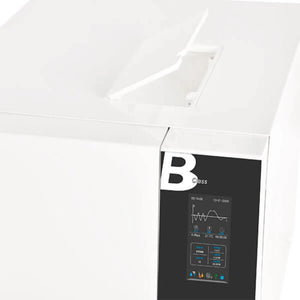
- LCD screen
- Control Panel
- Main switch
- Key for draining distilled and used water
- USB port
- Internal printer (allows printing of sterilization cycle reports on thermal paper after the cycle is complete.)
- Safety valve
- Ventilation grille
- Locking system
- Power cable
- Label
Accessories included
- Sterilizer
- USB
- 3 instrument trays
- Tray support
- Handle for removing trays
- Door adjustment tool
- 2 drain hoses
- Advice for the door
- Instruction manual
Regulations
- 93/42/EEC The Medical Care Directive.
- 97/23 / EEC Pressure Equipment Directive.
- EN 13060 Small steam sterilizers.
- EN 61326, EN 61000 EMC.
- EN 61010-1, UL 61010-1 safety requirements.
- EN 61010-2-040, IEC 61010-2-040 Particular requirements for steam sterilizers used for the processing of medical materials.
Autoclave step-by-step process
1. Open the door, take out the tools and accessories from the sterilization chamber, remove the packaging and clean them.
2. Connect the power cord to a suitable power source.
3. Plug in the printer.
4. Powering On: The main power switch is located on the front, at the bottom right of the device. Once switched on, the LCD screen will illuminate and display the basic operating symbols. sterilizer, such as door position, water level, sterilization program, date, time will light up.
5. Remove the top cover and fill the reservoir with distilled water. If a beep sounds, it means you have exceeded the permitted water level in the reservoir. Empty the excess water until the alarm stops.
6. Preparing the equipment for sterilization: Place the instruments on the different trays and separate them according to their material. If the instruments are not stainless steel, use sterilization pouches. These must not touch each other. Check that all instruments are properly positioned so that no water remains in the hollow parts. Do not overload the instrument trays or place them in direct contact with the walls of the sterilization chamber. Do not use paper clips or needles to avoid damaging or malfunctioning the autoclave.
7. Select the sterilization program.
8. Start the sterilization cycle.
After selecting the sterilization program, place the instruments on the trays in the chamber using the plastic clip provided.
Once the instruments are properly placed inside, close the door. Caution: Make sure the door is securely closed, otherwise the The sterilizer will not be able to function.
9. Start the sterilization program.
Press the start button, the autoclave will start working for approximately 30-75 minutes.
10. End of sterilization cycle.
Once the sterilization cycle is complete, the printer will automatically print the full cycle report.
Once the pressure has dropped to 0, you can open the door and remove the instruments. The autoclave will alert you with an audible signal once the sterilization cycle is complete.
Caution: Use the plastic tweezers to remove the instruments.
IMPORTANT: Do not reuse the used water after emptying the tank.
It is important to keep the packaging box in case of after-sales service.
Description
12-liter white Class B autoclave with USB and integrated printer
Details of the guarantees
Security
- It is essential that the water quality be less than 20 microsiemens for the autoclave to be able to start the cycles.
- The cycle will not start if the door is not properly closed.
- The automated safety system with a double hydraulic locking device prevents the door from opening while the chamber is under pressure.
- The safety valves prevent the pressure generator and the camera from working.
- A safety thermostat prevents overheating in the room and the generator
- An automatic safety lock prevents accidental opening of the door during the sterilization process protector automatically cuts off the electrical power if there is a short circuit somewhere or the power supply is not very stable.
- Fault alarm indicates a failure cycle and the detailed error code.
- Door alarm indicates that the door is not secured.
- Low water alarm indicates when the water tank is empty or too full.
Technical specifications
- Voltage: 220-240 VAC; 50/60Hz; 10A
- External dimensions of the device: W x H x D: 420 x 370 x 595 mm
- Tabletop dimensions: 315 x 160 mm
- Circuit breaker: F16A / 400V
- Rated power: 1500 VA
- 1750W
- Sterilization temperature: 121°C / 134°C
- Distilled water tank capacity: 2.5 L
- Operating temperature: 5°C / 40
- Relative humidity: Max. 80%, non-condensing
- Net weight: 40 kg
- Maximum noise level: <70 dB
- Atmospheric pressure of 76 kPa / 106 kPa
Icanclave Autoclave: Maintenance and Error Message Guide
Components
- Distilled water reservoir
- LCD screen
- Control Panel
- Main switch
- Key for draining distilled and used water
- USB port
- Internal printer (allows printing of sterilization cycle reports on thermal paper after the cycle is complete.)
- Safety valve
- Ventilation grille
- Locking system
- Power cable
- Label
Accessories included
- Sterilizer
- USB
- 3 instrument trays
- Tray support
- Handle for removing trays
- Door adjustment tool
- 2 drain hoses
- Advice for the door
- Instruction manual
Regulations
- 93/42/EEC The Medical Care Directive.
- 97/23 / EEC Pressure Equipment Directive.
- EN 13060 Small steam sterilizers.
- EN 61326, EN 61000 EMC.
- EN 61010-1, UL 61010-1 safety requirements.
- EN 61010-2-040, IEC 61010-2-040 Particular requirements for steam sterilizers used for the processing of medical materials.
Autoclave step-by-step process
1. Open the door, take out the tools and accessories from the sterilization chamber, remove the packaging and clean them.
2. Connect the power cord to a suitable power source.
3. Plug in the printer.
4. Powering On: The main power switch is located on the front, at the bottom right of the device. Once switched on, the LCD screen will illuminate and display the basic operating symbols. sterilizer, such as door position, water level, sterilization program, date, time will light up.
5. Remove the top cover and fill the reservoir with distilled water. If a beep sounds, it means you have exceeded the permitted water level in the reservoir. Empty the excess water until the alarm stops.
6. Preparing the equipment for sterilization: Place the instruments on the different trays and separate them according to their material. If the instruments are not stainless steel, use sterilization pouches. These must not touch each other. Check that all instruments are properly positioned so that no water remains in the hollow parts. Do not overload the instrument trays or place them in direct contact with the walls of the sterilization chamber. Do not use paper clips or needles to avoid damaging or malfunctioning the autoclave.
7. Select the sterilization program.
8. Start the sterilization cycle.
After selecting the sterilization program, place the instruments on the trays in the chamber using the plastic clip provided.
Once the instruments are properly placed inside, close the door. Caution: Make sure the door is securely closed, otherwise the The sterilizer will not be able to function.
9. Start the sterilization program.
Press the start button, the autoclave will start working for approximately 30-75 minutes.
10. End of sterilization cycle.
Once the sterilization cycle is complete, the printer will automatically print the full cycle report.
Once the pressure has dropped to 0, you can open the door and remove the instruments. The autoclave will alert you with an audible signal once the sterilization cycle is complete.
Caution: Use the plastic tweezers to remove the instruments.
IMPORTANT: Do not reuse the used water after emptying the tank.
It is important to keep the packaging box in case of after-sales service.
Marque :
Icanclave Autoclaves
|
Référence :
49.015
12 Liter Class B white autoclave with USB and integrated printer

In short
Class B 12 Litre White Autoclave with USB backup and integrated printer. Safety with double hydra...
Read more
- Regular price
- CHF 1,823.00
- Sale price
- CHF 1,823.00
- Regular price
-
CHF 2,805.00
Tax included.
Shipping calculated at checkout.
🚚 Disponible immédiatement
Disponibilité : actualisez la page une fois la variante sélectionnée pour mettre à jour la disponibilité

Secure Payment: Visa, MasterCard, Amex, Apple Pay

Free delivery from 100€ purchase including tax

Delivery to your office, to a relay point or to your home!
Couldn't load pickup availability
Référence My Podologie : Translation missing: en.products.product.sku:49.015
EAN :
Garantie : 1 year
Caractéristiques : Non spécifiées
Mentions particulières : Photos non contractuelles


